Archive for July, 2011
Fermented Garlic

I have found that one of the hardest things to keep in my pantry is fresh garlic. It’s not that it’s hard to keep it stocked, it’s more that I think I have it and I don’t or even worse I have it, but it’s disgusting. I have tried over the last couple years to come up with a way to store garlic. The best results I’ve had so far is with fermenting it. It has a great flavor, texture, and should last in the refrigerator for a couple months.
Ingredients:
- 6-7 bulbs peeled garlic
- 1 tbs pickling salt
- spring or filtered water
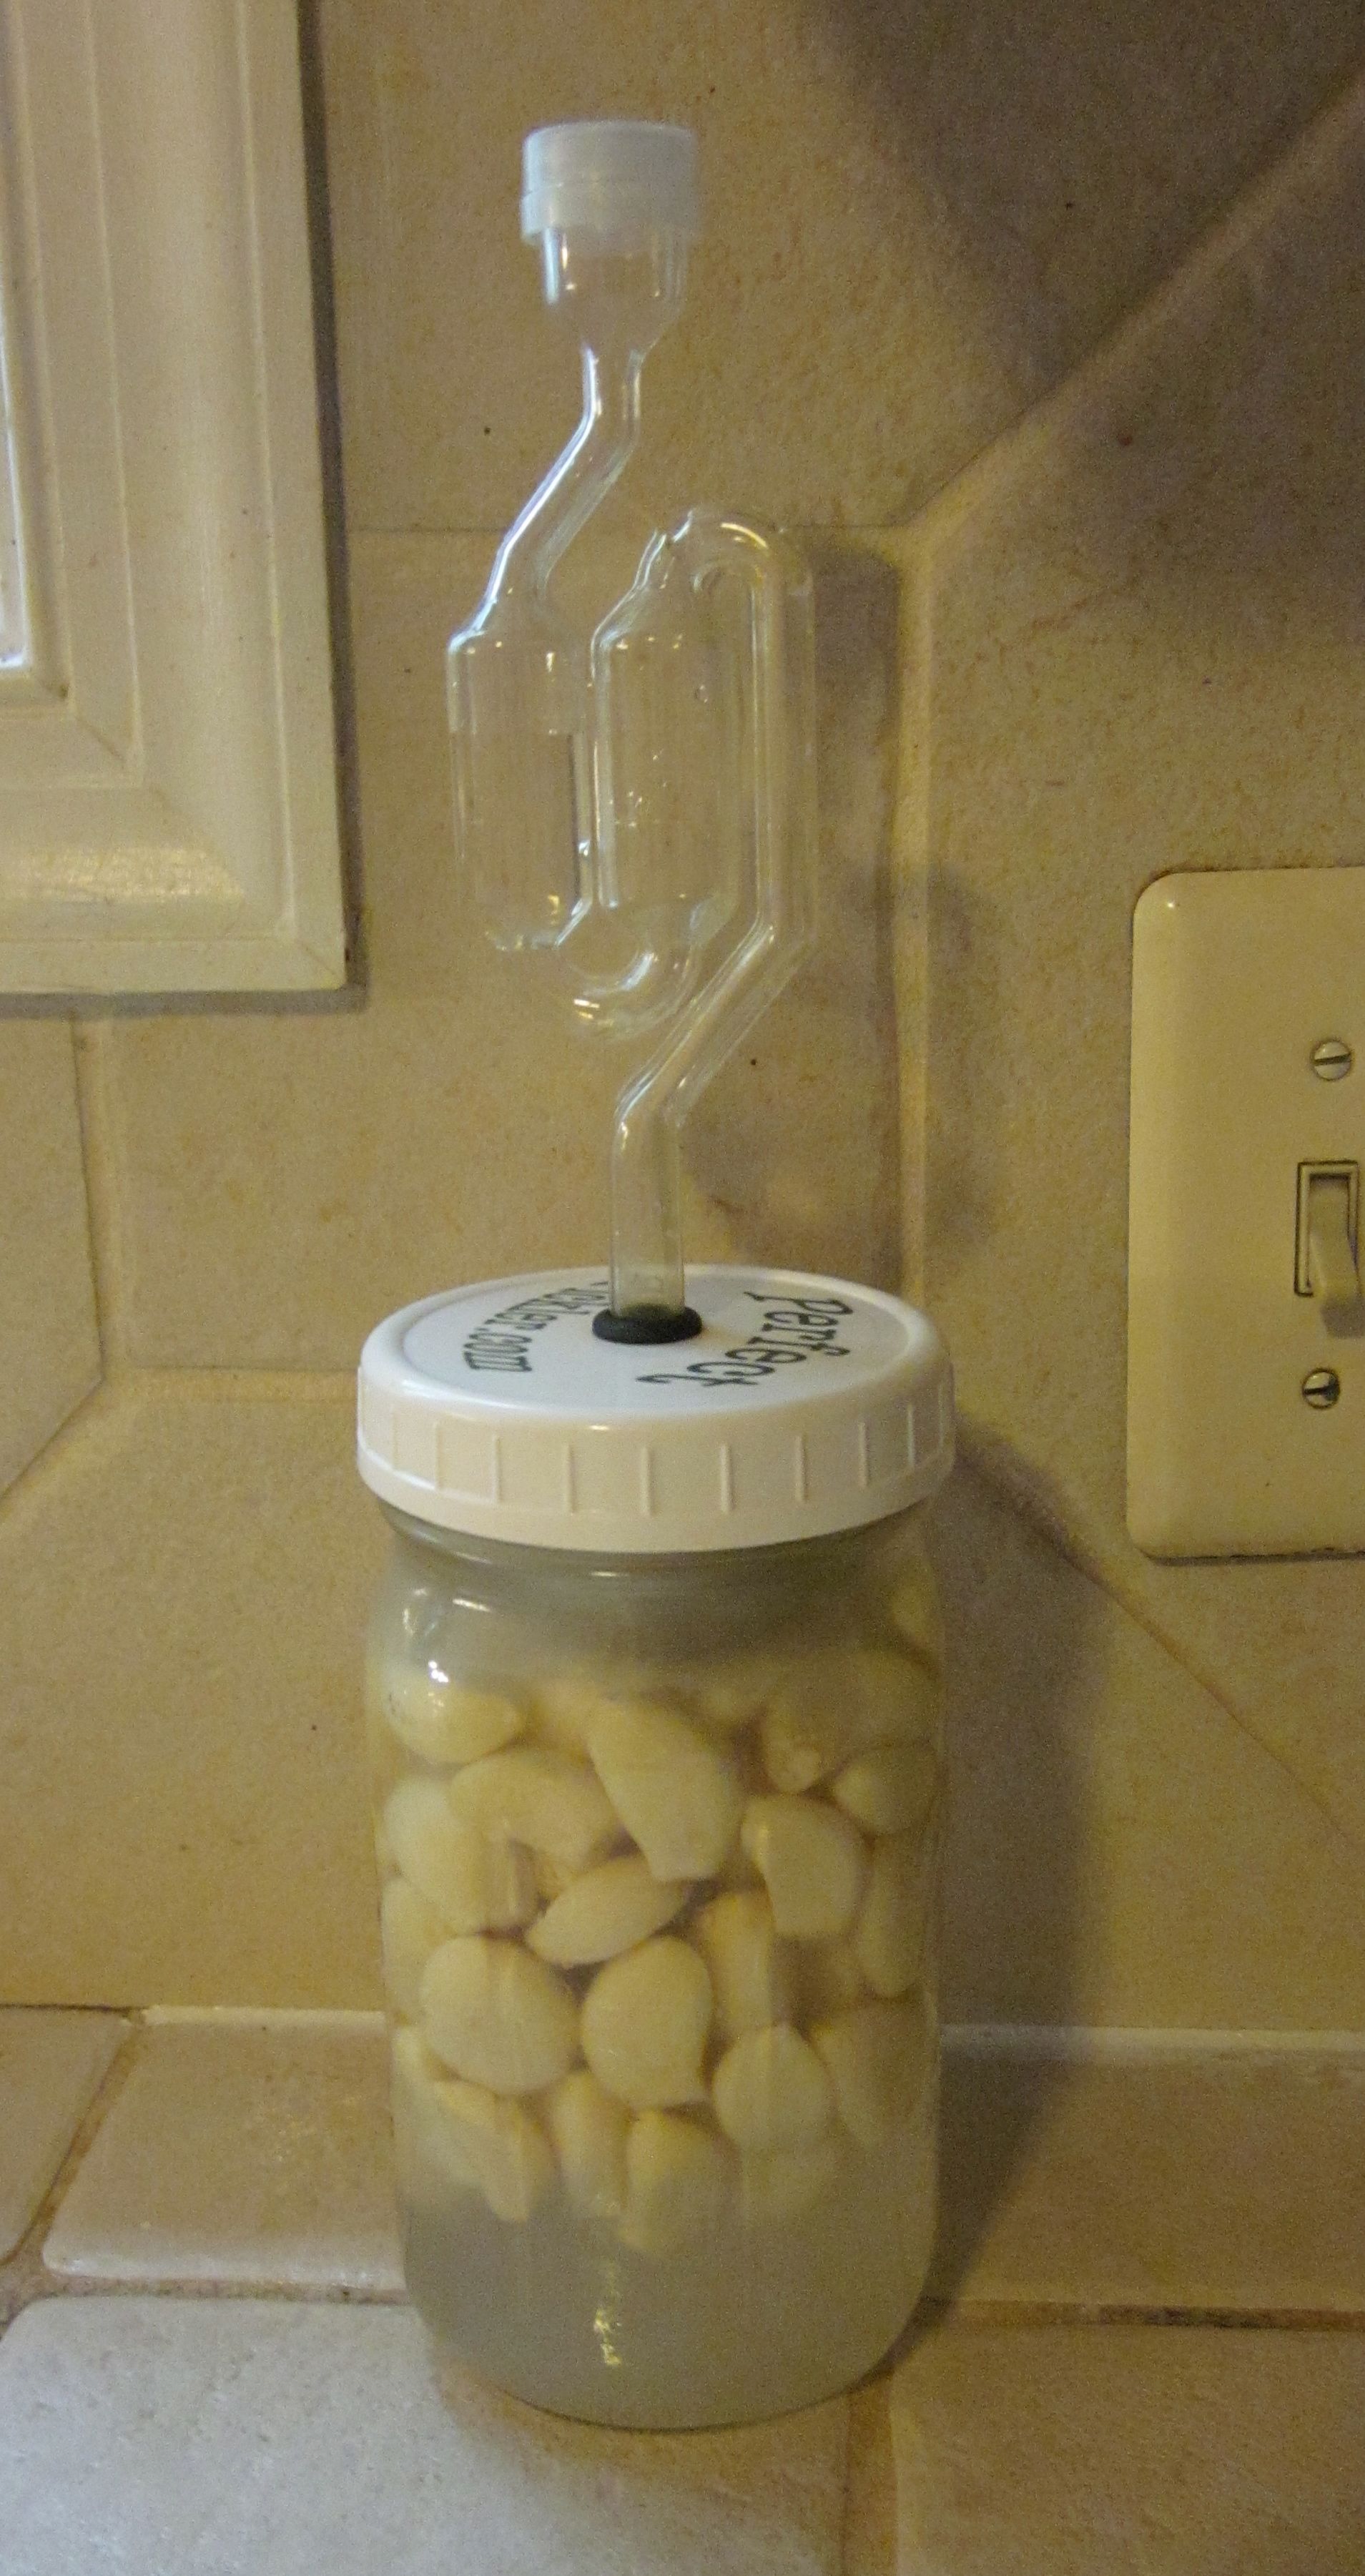
Place garlic, salt, and enough water to cover in 1 quart jar. Cover and set on counter. I use a canning jar and plastic lid. I also have an airlock and grommet that I purchased on eBay. It allows air to escape without letting air in. I think you can also loosen the cap every couple days to release the pressure. Here it is after 2 weeks.

I found a lot of different information about fermenting before I tried this. Some say it only needs a few days of fermenting. I let it ferment 4 weeks the first time and only 2 the next. I was happy with the results both times. The garlic might turn green. I had one batch that turned green and one that didn’t. The texture should be nice though (not soft or squishy). Store it in the refrigerator in the fermenting liquid.
 The fermenting liquid has a nice flavor as well. I froze the extra liquid into cubes to throw into soups and things. I’ve only tried this twice so I’m no expert. I was very happy with the results though.
Dry-Aged Steaks
I recently discovered dry-aged steaks and knew I had to try it. After searching and looking at different options I went with dry-aging bags that I purchased online. The one issue I had with using these bags was the vacuum sealer. It is possible to get a seal with a Foodsaver or similar vacuum sealer, but the chamber vacuum sealer is the easiest.
Ingredients:
- 1 large rib eye roast (up to 8 lbs)
- 1 roast (small) size drybagsteak
Here’s the roast I used

Place the roast into the drybag. Do not rinse or trim. Vacuum seal.

Place in the refrigerator on a cookie rack or something that allows air to circulate around all sides.

Let age about 3 weeks. It will lose about 1/4 of it’s original weight after drying
 Trim some of the hard, dark edge off the roast and slice into pieces. I try not to trim off too much, just enough so that it’s not hard on the outside. I trimmed off about 12 ounces.

Don’t throw away the trimming it can be used for other things. I use it for beef broth, add it to hamburger meals, and make dog treats with it.
Read Full Post | Make a Comment ( None so far )Easy Hamburger Meals

I love to cook, however sometimes I need a meal that is quick and easy to put together. We like the boxed hamburger meals, but I wanted something that I could use my own spices and ingredients. They are very easy to adjust to your own taste. This recipe is for the Salisbury flavor. Here is the document I use for other flavors: Hamburger Meals.
Ingredients:
- 1 lb hamburger
- 1 tbs cornstarch
- 1 tsp salt
- 1 tbs onion powder
- 1 tsp garlic powder
- 1/2 tsp pepper
- dash Worcestershire
- 2 cups water
- 2 cups milk
- 1 1/2 cups egg noodles
Brown hamburger and drain.

Add remaining ingredients (I added a cup of sliced mushrooms as well). Cover and simmer 20 minutes.

Turn to low and simmer about 5 minutes until thickened. Serve.

I’ve tried most of the variations and they are all good.
Read Full Post | Make a Comment ( None so far )English Muffin Bread (Microwaved)

This is a great breakfast bread with a nice flavor. After mixing it is completely finished in the microwave so it couldn’t be easier.
Ingredients:
- 1/4 cup water
- 1 cup milk
- 3 cups flour
- 1 pkg yeast
- 2 tsp sugar
- 1 tsp salt
- 1/8 tsp baking soda
- cornmeal
Heat the water and milk in the microwave about 1 minute. Combine flour, yeast, sugar, salt, and baking soda. Add warm water mixture and mix well. Add a little more flour if necessary. It should be a soft sticky dough.

Spray a glass loaf pan with oil. Sprinkle with a little cornmeal just to cover.

Pat dough into pan and sprinkle with a little more cornmeal.

Place in microwave and cook 1 minute at 50% power. It is very important to microwave at half power or the bread will start to cook. Let the bread rest for 10 minutes. Repeat microwaving 1 minute and resting 10 minutes 2 more times. After the last resting time microwave at 100% power for about 5 minutes. Remove from pan and slice.
 Try toasting it and making eggs benedict. Delicious!
Ginger-Sesame Chicken and Spinach

This is a recipe I tried for the first time tonight. It is quick and has a very nice flavor. I served it over steamed rice.
Ingredients:
- 1 1/2 lb chicken breast
- 2 tbs fresh grated ginger
- 2 cloves garlic
- 1 – (6 oz) pkg fresh baby spinach
- 2 tbs sesame oil
- 1 tbs sesame seeds
- 1/2 cup chicken broth
- 2 tbs cornstarch or arrowroot (optional)
Dice the chicken and start it cooking with the ginger. I think I had closer to 2 lbs of chicken.
 In another pot heat the garlic, spinach, oil, sesame seeds, and chicken broth. Cook until the spinach is wilted.
 Add the chicken to the spinach and heat through. Add arrowroot (or cornstarch) to thicken the sauce slightly.
 Serve over steamed rice.

Butter, Buttermilk, and Sour Cream
I’ve been making my own cultured milk products for awhile now. It’s so easy to do and I like the freshly cultured flavor.
Ingredients:
- 1/4 tsp cheese culture
Buttermilk:
- 1 quart whole milk
Sour Cream:
- 1 pint heavy cream
Butter:
- 1 pint heavy cream
I use a Mesophilic 100 starter purchased from thecheesemaker. I use this culture for Fermented Sauerkraut as well. One small bag lasts me for at least a year. The picture shows the ingredients for butter or sour cream.

For the buttermilk, sour cream, and butter combine the milk or cream with the cheese culture and leave on the counter overnight. In the morning place in the refrigerator to cool. The buttermilk has a slightly lumpy appearance. Here’s what the butter and sour cream look like.

For the butter cool it in the refrigerator for a little while. I think there’s an optimal temperature, but I haven’t found much difference in how I do it. Start blending it using a mixer. It will start getting fluffy like whipped cream.

Keep mixing it. It will start to turn yellowish and get a little grainy. This is after 15 minutes.
 Once it starts to turn grainy it is very close. Continue to mix another 2 or 3 minutes until the butter has completely separated.
 Strain the buttermilk from the butter. Add about a cup of ice water to the butter, mix, and strain to remove any excess liquid. Repeat two or three times. Add salt if desired and refrigerate.


