Cultured, Cured, or Fermented
Fermented Garlic

I have found that one of the hardest things to keep in my pantry is fresh garlic. It’s not that it’s hard to keep it stocked, it’s more that I think I have it and I don’t or even worse I have it, but it’s disgusting. I have tried over the last couple years to come up with a way to store garlic. The best results I’ve had so far is with fermenting it. It has a great flavor, texture, and should last in the refrigerator for a couple months.
Ingredients:
- 6-7 bulbs peeled garlic
- 1 tbs pickling salt
- spring or filtered water
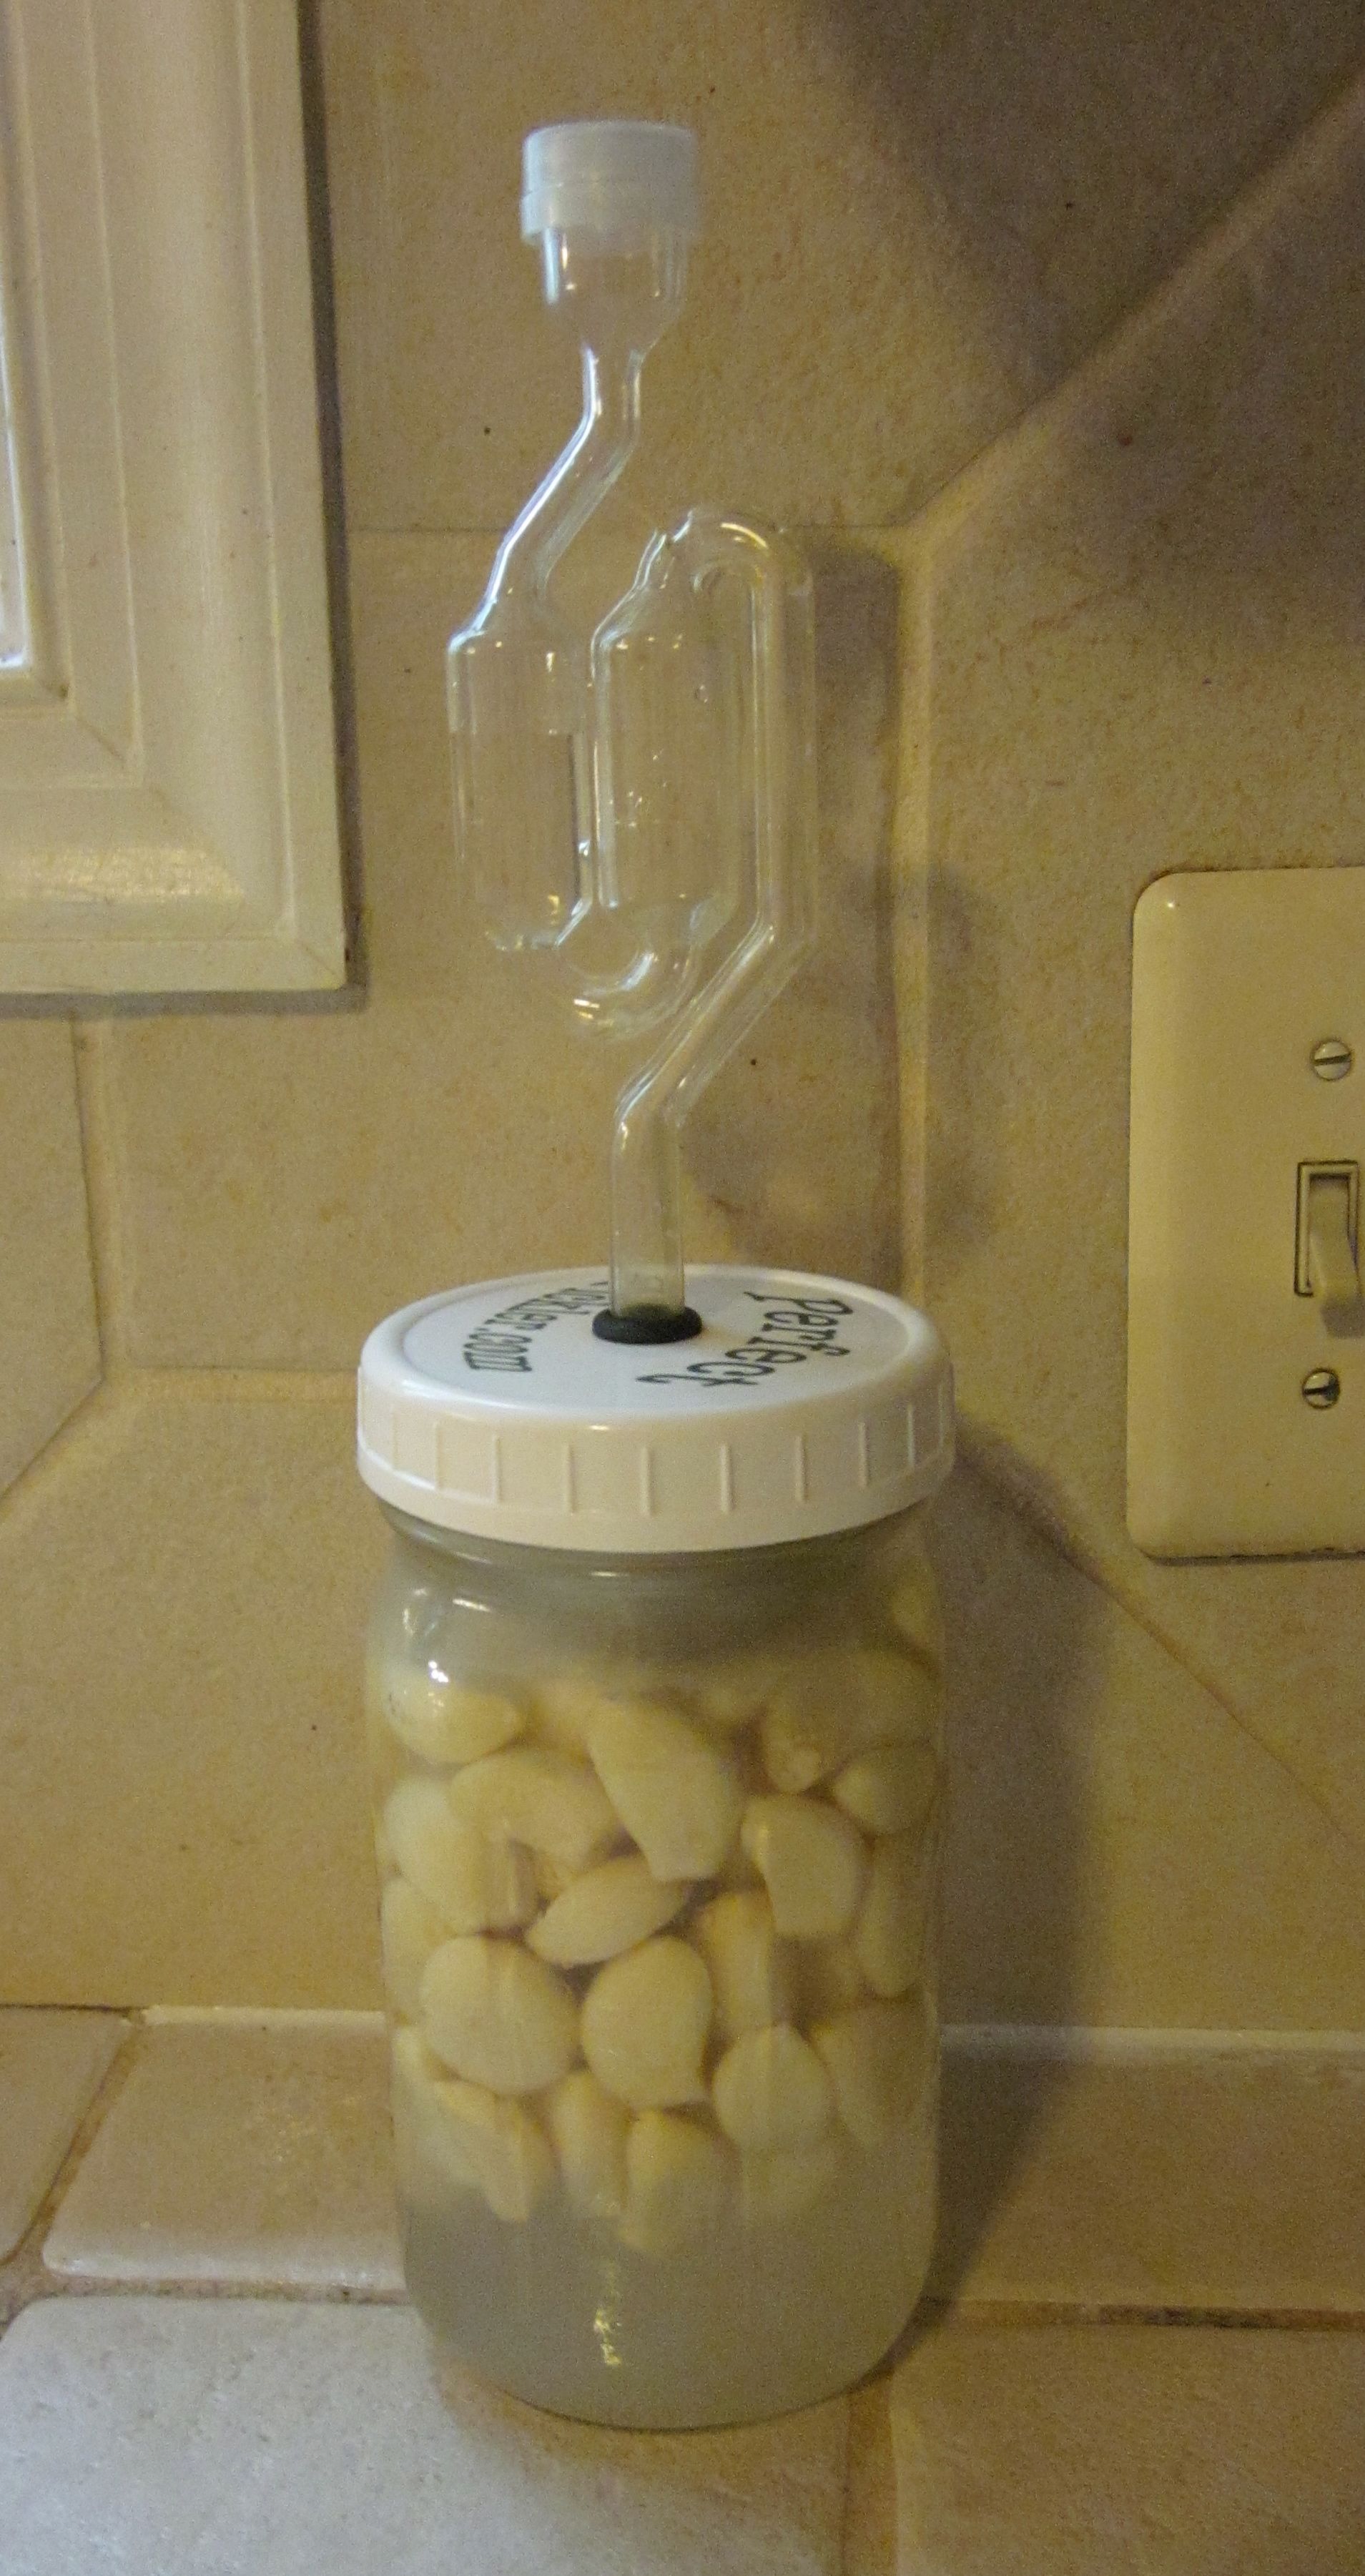
Place garlic, salt, and enough water to cover in 1 quart jar. Cover and set on counter. I use a canning jar and plastic lid. I also have an airlock and grommet that I purchased on eBay. It allows air to escape without letting air in. I think you can also loosen the cap every couple days to release the pressure. Here it is after 2 weeks.

I found a lot of different information about fermenting before I tried this. Some say it only needs a few days of fermenting. I let it ferment 4 weeks the first time and only 2 the next. I was happy with the results both times. The garlic might turn green. I had one batch that turned green and one that didn’t. The texture should be nice though (not soft or squishy). Store it in the refrigerator in the fermenting liquid.
 The fermenting liquid has a nice flavor as well. I froze the extra liquid into cubes to throw into soups and things. I’ve only tried this twice so I’m no expert. I was very happy with the results though.
Butter, Buttermilk, and Sour Cream
I’ve been making my own cultured milk products for awhile now. It’s so easy to do and I like the freshly cultured flavor.
Ingredients:
- 1/4 tsp cheese culture
Buttermilk:
- 1 quart whole milk
Sour Cream:
- 1 pint heavy cream
Butter:
- 1 pint heavy cream
I use a Mesophilic 100 starter purchased from thecheesemaker. I use this culture for Fermented Sauerkraut as well. One small bag lasts me for at least a year. The picture shows the ingredients for butter or sour cream.

For the buttermilk, sour cream, and butter combine the milk or cream with the cheese culture and leave on the counter overnight. In the morning place in the refrigerator to cool. The buttermilk has a slightly lumpy appearance. Here’s what the butter and sour cream look like.

For the butter cool it in the refrigerator for a little while. I think there’s an optimal temperature, but I haven’t found much difference in how I do it. Start blending it using a mixer. It will start getting fluffy like whipped cream.

Keep mixing it. It will start to turn yellowish and get a little grainy. This is after 15 minutes.
 Once it starts to turn grainy it is very close. Continue to mix another 2 or 3 minutes until the butter has completely separated.
 Strain the buttermilk from the butter. Add about a cup of ice water to the butter, mix, and strain to remove any excess liquid. Repeat two or three times. Add salt if desired and refrigerate.
Homemade Corned Beef

I was nervous the first time I made corned beef. The thought of a beef brisket sitting in the fridge for over a week is a little disconcerting. I’ve made it many times since my first attempt and haven’t had a problem yet.
It takes several days, but it is very easy to do. Slow cooking it with Fermented Sauerkraut is one of my favorite meals. I get my pink curing salt online at spicebarn.
Ingredients:
- 5 lb beef brisket
Brine:
- 1 gal water
- 2 cups kosher salt
- 1/2 cup brown sugar (or white sugar)
- 5 tsp pink curing salt
- 3 cloves garlic, crushed
- 1/4 cup pickling spice
Combine brine ingredients and heat to dissolve. Let cool completely. I usually heat about 3 quarts of the water with the other ingredients to dissolve then add 2 lb of ice to cool it quicker.

Trim fat from brisket and hit it several times on each side with a meat tenderizer.

Place beef and brine in a non-reactive container (stainless steel, glass, or plastic). You can also use a Ziploc bag. Weigh the beef down with a plate to keep it submerged.

Place in the refrigerator for about 5 days. Turn the brisket a couple times while it is brining. After it has brined remove and rinse thoroughly. A couple times it came out a little too salty. I have started soaking it in fresh water for about an hour after the corning process to remove some of the saltiness.

Sauerkraut (Fermented)

I have been making my own fermented sauerkraut for a couple years now. It takes a little time to make, but I think it is completely worth it. It is wonderful with Homemade Corned Beef.
Ingredients:
- 7 – 8 lb green cabbage (about 3 large heads)
- 2 green apples
- 2 small onions
- 3 bay leaves, crumbled
- 1/4 tsp cheese culture (optional)
Plus the following ingredients are per pound:
- 1 tsp pickling salt
- 1/2 tsp caraway seeds
- 3 juniper berries
Storage:
- 2 tbs salt
- 1/4 cup vinegar
Clean and quarter the apples and onions. Slice the stem off the cabbage and remove outer leaves. Reserve a couple leaves for later. Quarter and core the cabbage; do not discard the core.
 Slice the cabbage thinly.

Grate the cabbage cores, apples, and onions.

Combine the vegetables and bay leaves. Weigh all the ingredients.

The salt, caraway, and juniper berries are measured according to weight. My vegetables weighed 7 1/2 lbs so I added 7 1/2 tsp salt, 3 3/4 tsp caraway seeds, and 23 juniper berries. Mix with the cabbage mixture and allow to sit for 30 minutes.

I use a 5 liter Harsch fermenting crock (on the right). You can also use an open crock.
 Place a large handful of cabbage in the crock and press down firmly with a potato masher or spoon. Keep adding handfuls of cabbage and pressing it down until all the vegetables are in the crock.

Add the cheese culture. Some of the recipes for fermenting called for whey so I started adding the culture instead of whey. Add the stones and enough filtered (or spring) water to cover. If you are using an open crock spread out the reserved whole leaves over the vegetables. Then add enough water to cover.

Put the lid on the crock and add enough water in the trough to cover the hole. If you are using an open crock fill a large plastic bag with water, place that over the cabbage being careful to watch for trapped air. The reason it needs to be covered in this manner is so air can escape, but not get into the crock. Here is a close up of my crock that shows the hole that allows air to escape.

Allow to sit at room temperature for 4 weeks. Mine started slowly bubbling after 2 days and continued for about a week.

After 4 weeks has passed remove the lid. When you first remove the lid it might smell a little funny and the liquid will be cloudy. The important thing is that the vegetables still have a nice texture; not soft or squishy. Add the salt and vinegar storage ingredients to a one gallon jar. Remove the sauerkraut and place into your storage jar. Pour in the liquid from the crock. Cover and refrigerate. This lasts for months in the refrigerator.


